Monday, 27 February 2017

27/2/17 - Holmside

This afternoon the smokebox to boiler ring was finished machined and profiled round to give an acceptable transition between the smokebox and boiler cladding. The boiler is larger than the smokebox.  There will be a barrel extension welded to the front tubeplate from to slip over the ring, and give enough room for the main steam header.

Happy steaming!

Nigel

Friday, 24 February 2017

23 & 24/2/17 - Holmside

Yesterday and today's work involved setting up the smokebox in the loco frames. The holes were already drilled right through but this brought about the problem of not being able to do up the nuts on the inside under the smokebox.

So a solution was devised of silver soldering some M5 nuts on the inside of the smokebox, the flats and zinc plating was removed by machining off.

The bolts were shortened and the head stampings faced off.  The extra unused  holes in the frame were plugged up with copper and hammered over and filed flush.

The smokebox and chimney were sand blasted as there was no primer previously and the paint had burned off during silver soldering.

A piece of 1/2" brass angle was riveted with 5/64" rivets to the bottom of the smokebox to support the front deck plate.

The smokebox to boiler engaging ring was roughed out from some left over 4140 tyre material. Still more work to go but Michael spent quite a while at the lathe taking it down to size.

Happy steaming!

Nigel

Wednesday, 22 February 2017

22/2/17 - Princess Marina

Today the drop-down type firedoor was manufactured, being made up from stainless sheet.  The hinges were also fabricated from milled strip and 3/16" rod. There is a heat shield on the inside of the door which adds a bit of weight to keep it closed.  A simple handle was riveted to the door, it should be a bit cooler on the fingers.

The hinge block was milled from LG2 gunmetal bar, as I've had a mixed experience drilling small diameter deep holes in copper.  The hinge block is to be silver soldered to the backhead.

Happy steaming!

Nigel

Tuesday, 21 February 2017

20 & 21/2/17 Princess Marina

More work done on the Princess Marina boiler - the regulator is almost finished, just needs a handle and some sort of quadrant plate or stops to prevent over traveling the shut position.

The valve itself is a rotating teflon disc, to prevent scoring by being bronze on bronze.

More copper arrived so the longitudinal stays were finished off, the blower is 1/4" x 16 gauge.

Happy steaming!

Nigel

Friday, 17 February 2017

17/2/17 - Pansy

Today's work was to solder up the foundation ring, and make up all the firebox stays.  The job was preheated, silver soldered, and pickled for a visual inspection.

Michael H. was flat out making up 2.6 metres of wall, crown, and transverse stays, 69 in total from 1/4" copper rod. Each one was slightly chamfered for easy installation.

The process of silver soldering the stays has commenced.

A few copper test pieces were made for bronze brazing the girder stays.  One was done and cut in half revealing no penetration between the pieces despite a good fillet on the sides.   The second option has some centre punches on one of the plates to space them apart a few microns so the braze can get in between the plates.  Will see how that goes.

No pics from today but will save that for when the stays are soldered up!

Happy steaming!

Nigel

Thursday, 16 February 2017

16/2/17 - Pansy

This afternoon's work.  The foundation ring was milled out to clear the plate flanges, and fitted up with the inner and outer firebox. Some 3/32" rivets were used to hold the foundation ring in place, and the voids in the corners filled up with 3/16" copper rod filed to shape.  1/4" tube through the wall stay holes and 6mm thread bar holds the crown sheet at correct height.  All ready for the cookup tomorrow!

Happy steaming!

Nigel

Wednesday, 15 February 2017

15/2/17 - Pansy

The boiler barrel didn't quite fit the smokebox, so the steps and door hinges were removed and the smokebox set up in the lathe to see what's going on.

A quick spin revealed the ring at the back of the smokebox wasn't round, and had become distorted in the brazing of the smokebox, despite being a machined casting.  This was given a couple of cleanup skims and now fits the barrel nicely.

Next job to tackle on the boiler after the dome soldering job was checked, is the fitting of the tube nest and inner firebox to the barrel and outer firebox.  The tube nest and inner firebox was soldered in a jig so it's dead square.

I found the alignment of the tubes with the tubeplate a potential pest and time waster, these tubes are very easily bent as they are so soft from the annealing by soldering, and they all try and engage the tubeplate at the same time making for some difficulty getting it in.

So a batch of 1/2" brass tube aligners were made and they make it a cinch to do this job.  No stress no fuss, just push the tubeplate in and they do all the hard work guiding the tubes in.

The front foundation ring was cut and filed to shape and is used to help set up the firebox in position. 

I'm sure everyone has their own way of doing this, but the extra work makes for time saved in the end, especially on multiple boilers!

Happy steaming!

Nigel

A novel use of loco numbers!

Matt C. is an avid model engineer and qualified driver on the Victorian Railways, and definitely one of the main players keeping the steam alive in our southern state!

Recently he placed an order with us for some 1-1/16" scale NSWGR brass loco numbers for one of his future loco projects, but in the mean time they are looking great on his toolbox!

Matt kindly sent in some pics from yesterday's shift on one of the NA locos at Puffing Billy, to show us what he's done with the numbers on his toolbox. Great job!  He's also been working on a 5" gauge 32 class and ordered a set of our numbers for the cab.  Correct fonts make ALL the difference!

If you would like a set (8 digits) of 5" gauge 1-1/16" scale NSWGR loco numbers, it's $38 plus postage.   Just send an email to sales@npwoolley.com to place your order.

Happy steaming!

Nigel
 

Tuesday, 14 February 2017

14/2/17 - Pansy

Making use of the cool change, it was time to tackle the boilers again.

Next job was attaching the bottom dome flange to the boiler barrel. Previously described was the clamp to hold the barrel in the mill to cut the hole with a holesaw.

The bottom flange was marked from the interior of the boiler barrel to give the curved profile. A straightforward angle grinder job, and finishing off with files.

The dome flange was fluxed and set up in the barrel checking for square off the firebox. Firebricks set up to conserve heat around the boiler, and preheating done with a Sievert 110kw burner on LPG.

Silver solder work was done with a Comet #12 heating tip, which I find is just about right for 3mm copper. It's not too intense but has a bit of reserve.

Happy steaming!

Nigel

13/2/17 - Britannia

Continuing work in the smokebox, the spark arrestor was next. As previously described a couple of rings were made up, one for the blast cap and the other for the petticoat. The rings were spaced apart by a couple of struts. The whole lot removes by lifting clear of the blast cap and swinging out.

The silver soldering work was done in stages, the setup involved laying them flat on a base plate and soldering them to the blast cap ring, packed up to centre height of the ring. Then the struts were soldered to the petticoat ring.

Finally, stainless gauze was wrapped around the rings and folded over to form a lap joint and trimmed to shape. Stainless cable ties hold it in place.

Michael H. brought along his camera and tripod to give a photography demo, which was very much appreciated!

Michael also spent considerable time cleaning up the lathe after all the brass and cast iron swarf did its best to conceal the original colour. The white paint is dazzling!

The Ward 2a capstan lathe is almost ready for comissioning after a major rebuild, the headstock was filled with oil, and the coolant bilge was inspected and cleaned...and Michael did a good job making up some gaskets.  A couple of test cuts were done on a piece of steel, it's a very rigid machine!

Happy steaming!

Saturday, 11 February 2017

11/2/17 - Britannia

Today's work involved more smokebox plumbing for the snifter and the blower. The blower line and lost wax cast elbow on the outside of the smokebox was checked for blockage incase it was a dummy, but all is clear. Some of the plumbing and soldered unions in the batch of pipework with the loco has found to be blocked with solder or corrosion so it's always worth a check.

The transition taper inside the blast cap was machined smooth as it was stepped. A homemade tapered reamer was used as well as a boring bar set to a few different angles.

During machining the tapers I'd wondered whether rifling the blast nozzle to put a spin on the steam may give more entrainment.  There are many different types and shapes of blast nozzle, 3D printing and lost wax certainly gives us a lot more options!  Just need to design a replacable blast nozzle and find a suitably poor steaming loco for testing!

A couple of rings for the spark arrestor were made up as well. They will have a couple of struts to make a coned frame to easily attach the mesh.

We've been talking to Adam Cro from crofittings.co.uk about the Britannia's needs for valves and detail parts. He's got castings and ready made options, be aware he's a man in demand with these and there is a wait time!  We are looking forward to getting the manifold, clacks and injector steam valves as ready-made.  Have a look at his website, he's setting the bar high!  They are works of art, especially his fully functional vacuum brake valves!

Happy steaming!

Nigel

Friday, 10 February 2017

10/2/17 - Britannia

Boiling hot outside today, but bearable inside the workshop thanks to the aircon and insulation! Work on the Britt involved sorting out the big pile of Winson stuff (most was completely unusable).  Managed to find parts for a firedoor in all the bits.

Also I fixed the snifter valve and making an elbow fitting. The valve was tested and found to be constantly leaking past, so it was set up in the lathe and re-seated with a 3/16" end mill.

The elbow gets the snifter plumbing out of the way of the main steam union directly in front of it, so the boiler and main steam circuit can be installed into the smokebox.

The regulator rod gland needs some rework as it's way different to prototype. The bolts are also drilled in the wrong pattern and can't fit the gland and stuffing box. Some thought will be required and laying out a bolt pattern that won't clash with the existing holes. Would be great to get this correct as it's in full view.

Happy steaming!

Thursday, 9 February 2017

Big help!

Thanks to Michael H. for his time and assistance today in the workshop! He helped us get some much needed tasks done sorting out the machinery area, tying up the leads and cables, and finishing taping the roof insulation. Even learned how to put a job in the CNC router. Excellent stuff!

Wednesday, 8 February 2017

SMR guard's van complete!


Warwick A. has sent over some photos of a 5" gauge (1-1/8" scale) South Maitland Railways guard's van kit he's finished and detailed, working from our kit of parts and drawings.  Great job, it looks excellent Warwick!  Thanks for sending the pics!

Drawings & laser cut parts from NP Woolley
Wheel castings can be any 8 spoke 88mm diameter wheels, these came from EJ Winter
Polyurethane parts (Axleboxes, buffers, brake blocks, stove, and hook surround) came from Railcraft


Tuesday, 7 February 2017

Business Chamber Breakfast

Thanks to Brett Wild, Andrew Thomas and others of Branxton/Greta business chamber. I was invited to speak at the breakfast this morning as a new business in the area. I had a loco and boiler parts, plus some replica railway signage made here.

Thanks to all that came along and those who came to say Hello!

Looking forward to networking more closely with the community and local  businesses this year.

Happy steaming! (Steam is a lot of fun!)

Nigel

Monday, 6 February 2017

4/2/17 - Britannia

Saturday's work. The fittings either side of the regulator valve needed a bit of a clean up and deburring and to be drilled out to 7mm for good steam flow. The ball valve is 1/4" BSP but has a 7mm hole through it, I believe it's a 3/8" valve body.

The regulator drive spindle was made up from brass, milled to suit the flats on the ball valve and a brass sleeve silver soldered around it. Makes for the neatest fit without any slack.

A pair of blanking plugs for testing the superheaters were made up from the leftovers cut off the bulkhead fittings. Just had enough length, threads and cones were already done, and some 5/8" hex was machined to silver solder to these.

The regulator spindle cover and bush through the smokebox was the next to receive attention. The old Winson one was too rough to use and has no gland.

The hole in the smokebox was filed out and a new cover plate annealed and bent to suit. Next job is to make the bushes and gland.

Happy steaming in the heat! (Or should it be dieseling!?)

Nigel

Saturday, 4 February 2017

3/1/17 - Britannia

Yesterday the blast pipe was shortened and blast cap checked for fit.

The main steam bulkhead fittings were also shortened and the plumbing annealed and bent to suit. This gets the plumbing out of the way completely to make room for a spark arrestor.

The spark arrestor will be a necessity to prevent buildup of ash going down the blast cap now being so low in the smokebox.

Happy steaming!

Thursday, 2 February 2017

2/1/17 - Britannia

Some time was spent measuring and drafting up the smokebox. The diameter of the chimney and length of the petticoat and height of the blast cap needed to be checked.  The rule of thumb tapers for laying out the proportions of the above items were set out on CAD.

The Norman Spink Britannia drawings were also checked over to see what they were like.  The drawings took some time and cross referencing to get an approximate height of the blast cap, needing to work backwards from the frame drawing, smokebox saddle drawing, and the smokebox layout.  The main frames reference the bottom of the exhaust tee piece from a point in space on the centreline of cylinders.  Naturally part of the frames had to be drawn up to get this point.

The tee piece was drawn, and the blast cap.  The petticoat also, and the chimney.  The proportion tapers 1-in-3, and 1-in-6 were laid out from the rim of blast nozzle opening.  According to Martin Evans in "Model Steam Locomotive Construction" book, the tapers should intersect with the top of the chimney and the tangent point where the petticoat bell mouth meets the chimney bore.

The discoveries, after measuring up the smokebox and chimney we have here, revealed a larger diameter and shorter petticoat.  The proportion tapers suggest that for a larger diameter chimney, the blast nozzle needs to be further down to "fill up" the chimney with steam, and the petticoat length will be proportional to the diameter.

Steam locos are a bunch of balances and compromises based on proportions and a few rules of thumb.  What we don't want is a lack of vacuum in the smokebox from possibly sucking air down the chimney.

My theory with the Britannia is the firebox will well and truly produce enough steam based on surface area - it has a wide firebox, combustion chambers, and superheaters.  Drawing the air fast enough through the grate so the fire is lively and doesn't clinker will be the challenge.

The blast pipe was lowered until the exhaust steam 1-in-3 taper point met the petticoat bell.  Couldn't do much about the 1-in-6 taper not meeting the top of the chimney, without reverting to another design of blast cap.  The blower jets were checked to make sure they weren't blowing outside the petticoat bell.

This brought up the next thing to check, do the exhaust steam and blower jets foul the main steam pipes?  So a cross section was drawn to see what it looks like at that level.  Currently OK, will need more room for a spark arrestor though.

Below is a drawing for the Tech Heads to see what we're on about!!

Happy steaming!

Nigel


Wednesday, 1 February 2017

1/2/17 - Britannia

A bit of dress grinding around the firebox was required, to get the ashpan to fit a little better. The sides of the firebox were trimmed down until the ashpan bolted up with a minimal gap. Next time on a wide firebox I will set it up in the mill and take a cut, would save some time and effort.

The stay and rivet heads on the throatplate were dress ground to give some room for cladding. It's close to the rear driving wheels so space is precious.

The 1/4" ball valve regulator and steam circuit is the next subject of review. The existing ball valve was reviewed and the bore looked between 4 and 5mm which is the smallest part of the pipework. I had another 1/4" ball valve with a 7.5mm bore and same overall dimensions so it was swapped out.

The steam circuit plumbing seems to fit OK, a hydro test should reveal any leaks between the valve and the header flange...there are some aluminum washers there that may or may not give a seal. Certainly a workshop essential to have a hydro test pump!

I will make some 1 in 3 & 1 in 6 tapered test pieces to see how the blast pipe sits, and where the steam is meeting the petticoat. The 1 in 3 taper should meet the petticoat at the bottom radius close to where it meets the chimney bore, and the 1 in 6 somewhere below the top of the chimney. That way we can have some confidence the steam isn't billowing in the smokebox and also not sucking air down the chimney, for good smokebox vacuum. Short large diameter chimneys can be a challenge to get this to work.

I will also check the blast orifice diameter (Martin Evans' formula has worked for me before as a quick check). Locomotive draughting is a science in itself, and everyone has a different and sometimes conflicting viewpoint!  Rule #1 is the exhaust must be able to get out the chimney!

Large grate areas (wide firebox) for the same size piston and blastpipe  arrangement will have lower primary air velocity through the grates than a narrow firebox loco. According to the textbooks I have there is a formula and relationship of grate area to piston diameter, so they must be equally matched for efficiency. One outcome of low air velocity through the firebox is the tendency to clinker and a low steaming rate of the boiler. Interesting facts!

Happy steaming!

Nigel

Tuesday, 31 January 2017

31/1/17 - Pansy

This evening's work was to finish the barrel clamp jig and cut the hole for the dome.

A rather elaborate style holding jig for a 5" barrel was made to be able to get the hole square to the barrel and on centre with a rigid setup. A test piece of copper was used to try out a 40mm holesaw and see what sort of finish was possible. The diameter even with eccentricity on the holesaw was perfect for the dome flange.

The jig was clamped to the mill table and centre punch mark was lined up with the spindle. I ran out of Z travel on the table to fit the holesaw so it had to be done in two operations, drill the pilot hole and then fit the holesaw in. (The 4 inch head raising piece for a Bridgeport mill would be an advantage!)

The mill was set to low speed and the quill was driven off the handwheel with the quill lock half on to prevent any grabbing. Once the holesaw had cut a groove it didn't complain or chatter and rather uneventfully finished out a nice hole.

Clamp jig was dismantled to try the dome, which was just a little tight. A quick file to remove a burr made all the difference and it fitted perfectly square without any forcing one way or another, aligning off the machined hole as expected. The scriber traced the barrel inner profile  onto the dome to file that to shape.

This is a key thing to be aware of as the protrusion of the dome into the barrel sets the maximum height of water in the boiler. Once the steam entry into bottom of the dome is blocked by the water, a column of water goes right up the dome and into the main steam pipe.

A couple of boiler shapes I've seen,  notably the NSW 12/13 class could pick up water quite readily at half a glass if using the conventional steam collecting setup of dome and regulator. The stepped height between top of outer firebox and the barrel and the positioning of top gauge glass fitting on top of the firebox means the water level can very well be half a glass and begin priming! A long gauge glass in that case can be deceptive as to how much water can be carried before priming.

Some locos with tapered barrels have a cheat of a parallel barrel under the cladding, this too can be one to watch for. Naturally the steam should be coming from the highest point in the boiler, so a dry pipe should be run to the top of the firebox to eliminate this.

I have well digressed, it must be late!

Happy steaming!

Nigel

31/1/17 - Britannia

Today's work involved finishing the dumping centre grate. It has a stand and a sloping ledge in the ashpan that it sits on (so the ash falls off).

After the brazing work on the ashpan, the ashpan and boiler were assembled to the loco frame and trailing truck installed. The grates inserted up through the trailing truck frames and into the boiler, sitting on the ledge either side of centre. The centre grate portion was then installed into position using the new designed stand.

All worked very well and I thought it was a very easy matter to be able to install and remove grates. The stand on the centre grate required a loop on the bottom of the stand to hook it with a fire poker and pull it off the ledge. So the bits were removed and a bit of stainless rod was welded to the stand. Again another trial fit proved successful.

The ashpan seems to be structurally finished at least for now. A couple of brackets are required on the outside to hold various valves but these can be done with thru holes and nuts on the inside. Of course there is the damper lever and rod which will dummy up to the running board, none of that works or is hinged, it won't be highly obvious in the scheme of things.

The ashpan needs a sand blast and a good couple of coats of hi temp paint. It's steel and in the rust zone for sure, I didn't think I could do the amount of fab neatly in stainless!

Below are some pics of how it ended up looking. The views on the loco are looking up from below the trailing truck.

I definitely think the centre portion held up by a stand is an alternative for future designs.

Happy steaming!

Nigel

Update

Boy, the heat is back with a vengeance! Certainly enjoying the insulation in the shed! Australia Day holidays are a nice way to wrap up January.

Mentioning, again, the laser cutting/water jet cutting service for Model Engineers is back in action for the year, with a couple of jobs underway as we speak. A 2-3 business day quote and a 1-2 week manufacture time from placement of order. Postage is available to  anywhere in Australia so even for those out of state we will be happy to quote and send direct.  You can read more about it on our website under "Laser Cutting".

I'm trying to source some 5" x 3mm wall thickness copper tube for stock and some boilers. This is one of the most common diameter boiler barrels in 5" gauge. I have rolled some before which is still an option but makes for a bit of work. We need to believe God for a miracle! I hope to hear back from a supplier soon on that.

Through the Model Engineering work we've been able to do since we started, we have been able to support Mission work and child sponsorship. We have 2 sponsor kids in Burma who don't speak English, a brother and a sister. The boy loves soccer and wants to be a Church Pastor when he grows up. In years gone by I've sponsored a boy in Nicaragua through Compassion. He was able to complete the program at 18 and move onto being a man. It was an amazing feeling to look back and see how long I'd supported him and he was now exiting the program, with a good education and health care. We had kept in touch the whole time with letter writing. There's something exciting about doing something beyond ourselves and taking care of others.

How are your live steam projects going? Maybe drop us an email or comment to say "hi"!

Back to the workshop!

Happy steaming

Nigel

Wednesday, 25 January 2017

24/1/17 - Britannia

Before I get into the story, I think the blog post name including the date and the loco will be a good way to organise these blogs. It will be easier to search and view by loco project...there are a few currently on the go!!  Somehow less dull than "loco update, loco update, loco update"!

OK, back to the Britannia...

The grates needed a trim off the length and few notches out of the corners to fit the firebox but after that was done, they sat in the correct place. They sit on the ashpan and a ledge at the front, with the ledge trimmed in the centre to allow the centre portion to drop down.  The firebox tapers in all directions and it was a trick to get the bits in place and also removable through the ashpan hopper. I hope it's a success, it will be only able to be dumped in the steaming bay where access is possible between the tracks.

Those that have been following this build have seen the original Winson design and also the Norman Spink design have grates that are made from bars and spacers, with a dropping portion in the centre forward half.

The problem I forsaw with this scenario is the grate is trapped in and can't be removed without pulling the loco apart, a real pest if it bent or burnt out by clinker and strange coals we are getting these days! The whole thing was under designed from a maintenance perspective.

The grates now in position are made from stainless steel water cut plate, tapered bars and all. (If you want one, get in touch with us as our supplier has all the right gear). The grate is in 3 portions, the centre section is entirely removable and so makes room to get the other side portions out through the middle.

The next thing to sort out is how to keep the middle portion in place. I'd thought of the conventional cross pin underneath the grate but I don't think it's the easiest to line up with the holes in the ashpan as its a long way across. Also prone to bending over time. Plus it's another challenge to hold the grate up while trying to put the pin through! I must have piano fingers nice and slender, some other blokes have kranskys!

So the play time yesterday involved making a swinging stand under the centre grate that will sit on a ledge in the ashpan. Also helps removal as the stand can be used to pull the grate out and put it in. 

One of the challenges I face in model engineering is visualising a solution that will work in all cases as a standard fix, less time designing an easy-to-use solution will be a big plus. I think the stand under the centre grate may be a goer, I'd like a bit of feedback as to how it performs in service!

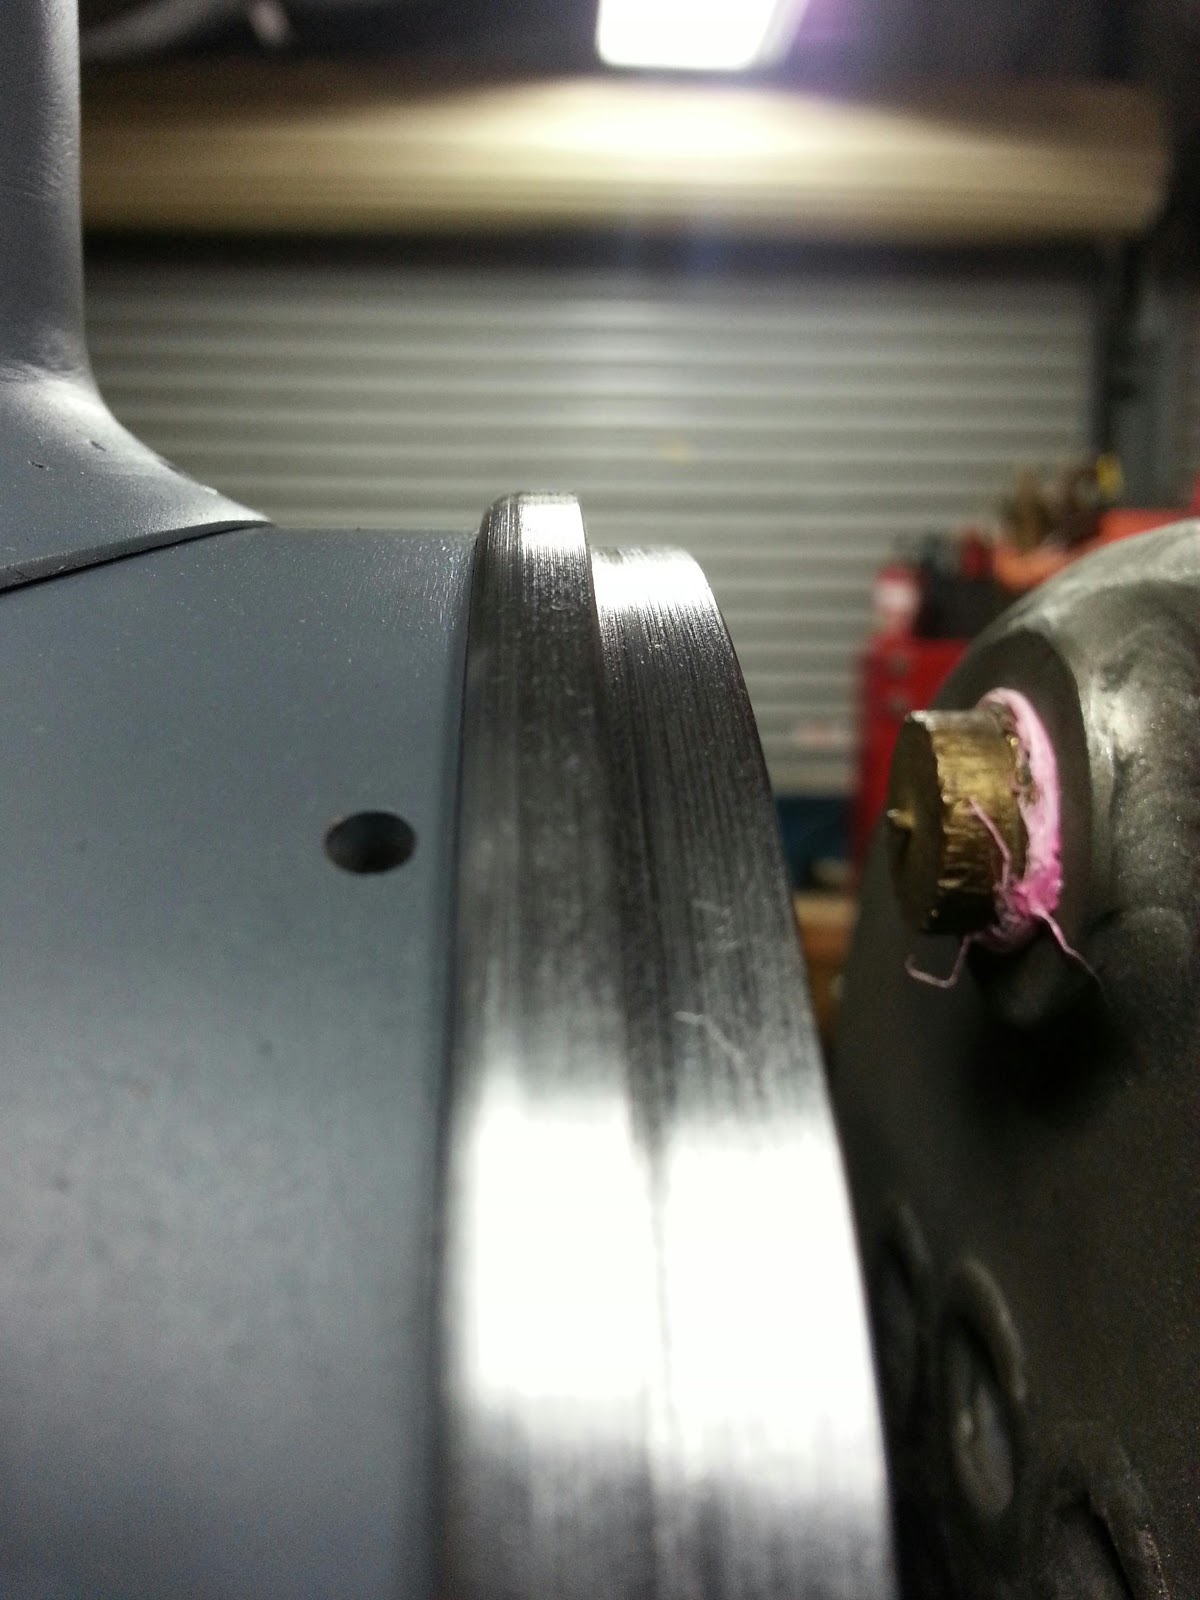
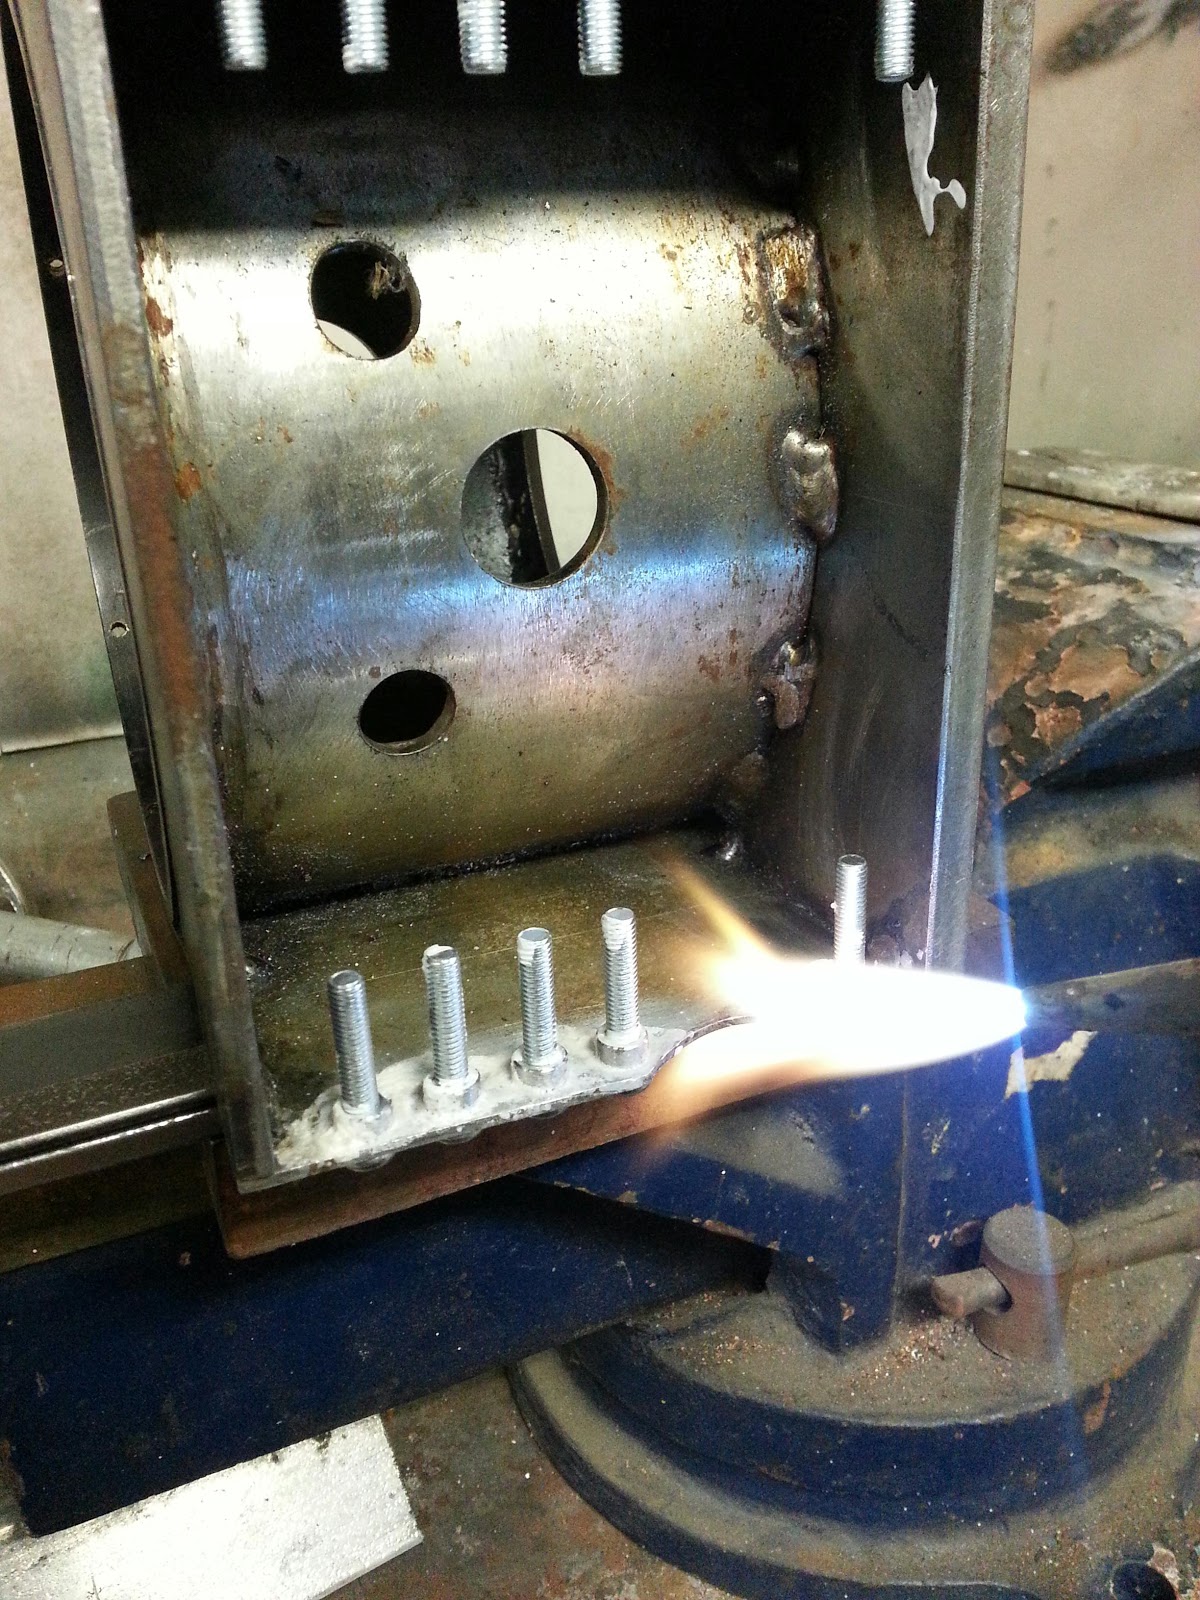
Below are some pics looking through the firehole...

Monday, 23 January 2017

Laser & water jet cutting

If you've designed your loco bits on CAD and are now looking for somewhere to get them laser cut, why not try our service?  Many customers have, and are now realising the benefits of using us to deal direct with the laser cutter.  Our supplier is also a fine Model Engineer, and knows how to set up the machinery to get a great result.

But what's new this time?  Firstly, we now have a CAD template on our website that you can download to start organising your order.  This streamlines the process for everybody, and helps you work out what you want.

Secondly, on our website we have a contact form and file uploader, so you can send us the CAD file and your details for a quote.

Thirdly, we will endeavour to obtain a quote for you within 2-3 business days, which will include postage direct to you.


Finally, we want you to experience an enjoyable and smooth process. We'd like to hear your feedback once you receive your order.

Happy steaming!


Friday, 20 January 2017

TrainAge

You may have noticed a link to TrainAge on our website! 

Somewhere back in 2015 a couple of friends approached us for some full size NSW loco numbers in the correct font to mount on their wall. Brass numbers weren't an option so the request was "Can you cut them in MDF and we paint them up ourselves in brass or chrome paint?

The shenanigans by one customer in the following weeks where 3801 chrome painted numbers were stuck on the side of an industrial 0-4-0 saddle tank loco were hilarious!

Since then different kits and defunct railway company logos have been developed, having sent them all over Australia. The 3D embossed effect of raised letters and shapes on the logo kits make a stunning deviation from a standard 2D sticker. The parts get painted and glued on a backboard of your choice, some have opted for a different shape or size, it's up to you how you want to mount them!

The railway station nameboard letters which are cut in Marine Hardwood Ply are also popular, some full-size and half-size signs have been built and others repaired using them. Live steam train clubs have used the letters for their stations and platforms. The heavy duty wrought iron bracket we sell has been measured off originals, hot scroll bent and welded, and drilled ready to go. The station nameboards and "tablet" signs such as Tickets are designed from standard mouldings and timber available from a hardware store, a drawing gets supplied with each order to guide you as you build.

Many of our new and young customers (not live steam guys) have enjoyed building the logo kits and mounting them on a back board or office wall or train set. They've sent us the photos of what they were able to do and in all cases it looks incredible, and it's always great to have the feedback. Thanks to the many who have made requests of what they want developed also

Not everyone is able to undertake a live steam loco or build a train set due to space restrictions, but you can have a fun few evenings putting together one of the kits or building yourself a station name board. For instance, you can use the nameboard letters to build a sign "Such-and-such Workshops" for your garage if you like to tinker, and enjoy the subtleties of the correct NSW or Victorian Railways fonts which have all been traced. Don't be afraid to be creative, the kits are to help you think outside the box!

If you are ordering letters or numbers, order the quantity of letters you require (add to cart) and put a note in the PayPal purchase telling us which ones you require. We now get instantly notified through PayPal of all orders, and your order will be despatched within 1-2 business days. 

Happy steaming!

Thursday, 19 January 2017

Ashpan

Thankfully the weather has cooled off a bit which makes workshop work much more pleasant!

The Britannia's boiler was set up in the mill to drill and tap some holes in the foundation ring to hold the ashpan onto the bottom of the boiler.  The bolt holes in the ashpan were thought out as to where to fit them clearing some cross drilled holes through the foundation ring and being out of view as much as possible.

Some brackets were made and bolted to the milling machine table which I could attach ratchet straps to. A very good way of holding strange shapes!

Monday, 9 January 2017

Welcome 2017!

Finally the Christmas break is over for us, and back into work this week.  I was hoping to make a start middle of last week, but only managed a shed tidy and a play with the capstan lathe, before some yard work and other things took priority!  This is the first year I have not worked through the period and time off was very refreshing.

We are expecting hot weather again this week, and I am certainly looking forward to lining the roof with insulation a bit later on when it cools off, it's a take-the-tin-off job.  Four Aussie summers in a hot tin shed is enough...the radiant heat from the underside of the tin certainly heats up the benches and the machines!  Some days reach 40-45 degrees and with the fans on feels like a fan-forced oven! 

On the work front, we are kicking off with prepping an order for laser cutting, (if you have stuff you need cut as well, send us an email).  The Britannia work is ongoing, the small jobs relating to the boiler/cladding/and what's under the boiler between frames will get looked at.  The Holmside boiler can go off for some welding of boiler guides and smokebox engaging ring.  The Pansy boiler will progress closer to completion, and hopefully the Princess Marina boiler can be finished, as only the regulator and longitudinal stays require manufacture.

Most importantly for this year I want to step up support for Christian mission work (as we have done over the last 4 years) and looking for opportunities to network with other organisations doing the same.  Our lives have been so changed, and continue to change the more we follow our Saviour Jesus Christ who gave his life for us all on the Cross.

A dream come true (I have many) would be to production-run some wagons and each wagon have a story of sponsoring a child or similar...putting some real life-changing purpose into our hobby of Model Engineering.  How can we practically do that?  I guess we will have to wait and see!

Anyhow, don't forget to SUBSCRIBE to our blog for updates, keep checking the website for new sections, and send us an email if you have comments, suggestions, or want to discuss your job.

Happy steaming!

Nigel