Saturday 24 December 2016

Pansy boiler progress

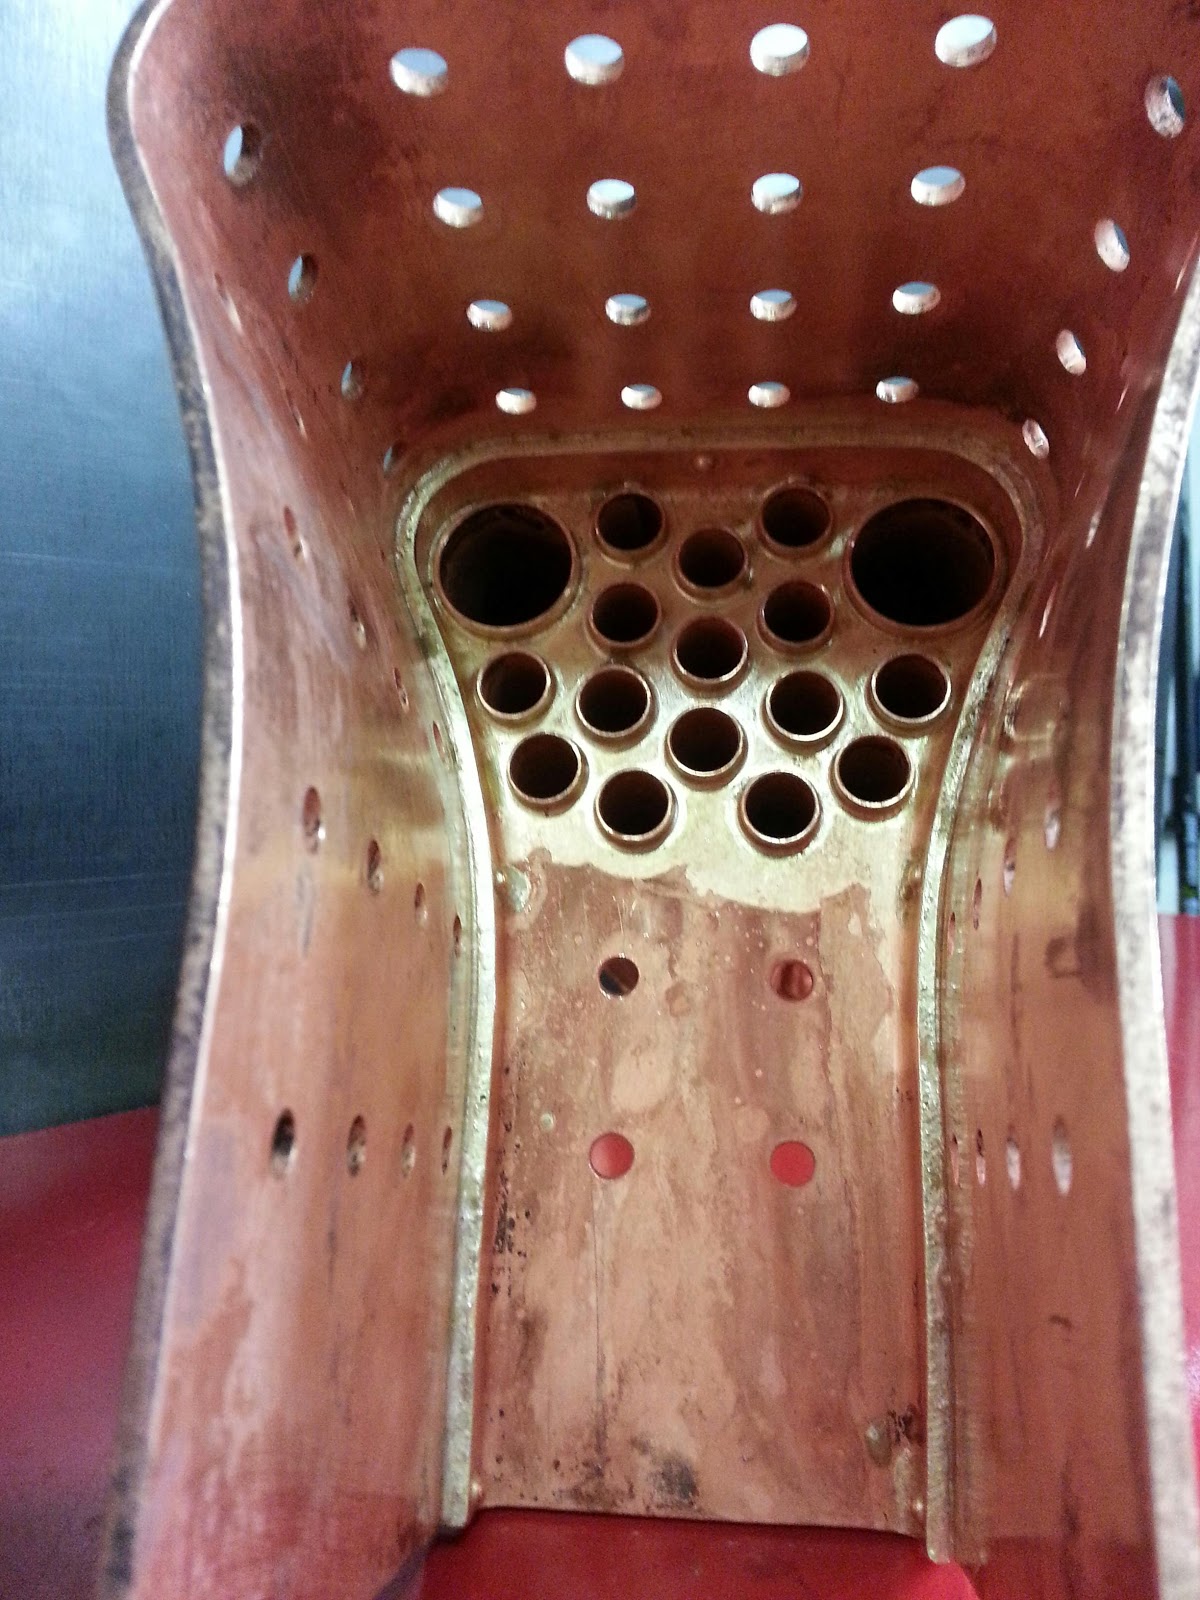
After the throatplate seams were cleaned up they were checked over for penetration. A good fillet on the inside satisfied me that it was all in good order and can now look at getting the dome onto the boiler barrel.

The dome flanges were machined from hollow gunmetal and drilled and tapped for the stainless capscrews. I can see the merit in studs but domes aren't regularly pulled apart so screws/bolts with good thread enegagement is sufficient and saves the work making studs and nuts.

The bottom flange has an o-ring recess which will have a Viton o-ring, to make easy resealing, no gaskets, no goo, and less torque required on the bolts to get the seal.  I once repaired a copper dome flange with stripped/pulled threads, required stepped studs and plenty of gasket goo with a gasket to seal it as it was warped from the tension required to get a seal!  Wrong material being too soft, not enough thread engagement, and very time consuming to get the gasket goo out from between the studs!

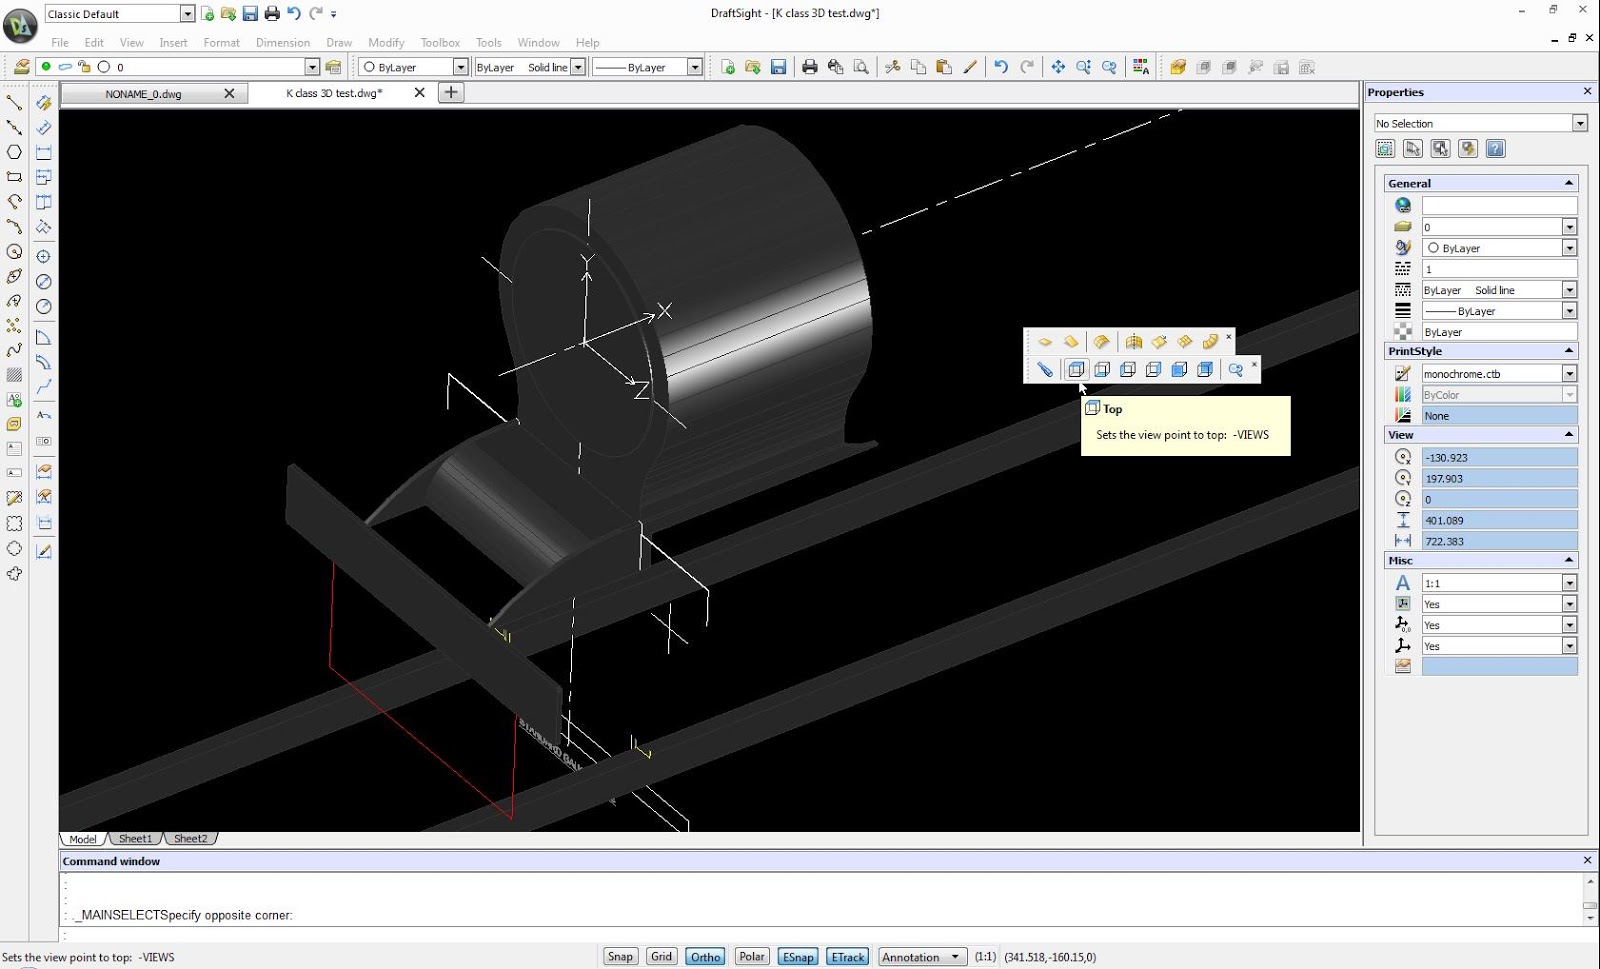
I've also been working on a jig to hold the barrel for setting up in the mill to do the dome flange hole. I'm expecting setting up the boiler in the mill to do the job means the dome flange is going to be square to the boiler from the getgo rather than mucking around with soldering jigs to square up a dome flange in an oversize hand-finished hole. The way copper tends to grab is good reason to get the clamping nice and solid.

Merry Christmas to you all and hope to catch you back again in 2017, let's make it a great year!

Don't forget you can subscribe to our blog to be emailed these updates as well!

Happy steaming!

Nigel

www.npwoolley.com

Thursday 22 December 2016

Pansy boiler progress

Some more work on the Pansy boiler construction, barrel/throatplate/firebox seams underway. First they were set up to be drilled and riveted, given a super-clean, fluxed, and then riveted.

After that was done, the boiler stood up on end and surrounded with firebricks to conserve heat.

Then a good preheat done with the LPG and slowly worked around the seams with the oxy and silver solder. The capillary action of the solder brought a good show on the inside of the seams, with a couple of areas around the outer firebox to touch up from the inside. The areas to add a little more were marked close by on the copper with some chalk.

Below pictures show both set ups.

Happy steaming!

www.npwoolley.com

Tuesday 20 December 2016

Boiler nearing completion

Not much more work to go on Princess Marina's boiler to finish off. Just the regulator and longitudinal stays and the firedoor hinge to complete the boiler, ready for a hydro test.

Over the last few days it has been non-stop working through the weekend to get the foundation ring in, stays done and the firebox door plate and firehole ring ready for fitting the backhead.  The boiler inspector checked it on Sunday and gave the nod to finish it off so yesterday and today was spent soldering up the backhead and wall stays and tackling the regulator.  This warm weather is making it a hot job!

Next boiler to complete in the new year will be a 5" gauge Pansy boiler.

We hope you have a Merry Christmas and a Happy New Year!

Cheerio!

www.npwoolley.com

Friday 16 December 2016

Princess Marina boiler progress

A quick snap today of the crown stays going in a 3-1/2" Princess Marina boiler.  All those firebricks help conserve the heat.  Quite a lot of radiance off the copper as well.

I have two torches, LPG for general preheat and oxy/acetylene for local work.

Happy steaming!

www.npwoolley.com


Thursday 15 December 2016

Tram progress

Boiler work underway this week, but not much to show off yet.

It's been a little while since last working on the Tram, but the running gear is coming together now. Evenings are just as busy as the days!

The sprockets I was after aren't available so I am in the process of making my own. Basically a hub and laser cut teeth.

There's always something to learn, the sprocket teeth being laser cut still needed a fair clean up with a file. The profile of the teeth was correct on the CAD file but the laser cut still made it too tight for the chain to fit on properly, so out came the chainsaw file for some cleanups. Something was amiss between the transition of radii on the root to tooth, the laser cut put a little step where they transition.  All that added up to 200+ teeth to fettle!

Chainsaw files are excellent, I use them all the time. I'm not sure of they are made from different steel but they do brilliant work to castings and any other tough skinned surfaces without losing an edge.

Happy steaming!

www.npwoolley.com

Saturday 10 December 2016

More boiler photos

A bit more work on the Pansy boiler construction today...firebox and tube nest silver soldered up ready for the next steps. Barrel and butt strap done as well, will be joined to the throatplate and outer firebox shortly.

Happy steaming and have a nice weekend!


VR N class (steam) drawing list

I've compiled a list of the Victorian Railways N class drawings I have available, and you can dowload it on Modeller's Hub  <- click link to go to page.

Happy steaming!

www.npwoolley.com

Wednesday 7 December 2016

VR I & GY 4 wheel wagon underframes

After searching through the various Victorian Railways rollingstock drawings, I've finished a couple of 1-1/8" scale "interface" drawings for the I & GY 4 wheel wagons, showing wheels, axles, and underframe dimensions. 

These drawings provide fixed dimensions of the track and wheels, sole bar spacing, and buffer centres.  Using my drawings together with the railway drawings will give a big benefit to the modeller, as you can work straight off the railway drawings and photos for details specific to your model.

These will soon be available as separate drawings for purchase.

Happy steaming!

www.npwoolley.com

Monday 5 December 2016

Model Engineering philosophy

The two words "model" and "engineering" coming together in model engineering certainly makes for interesting discussion!

The philosophy that we take to build a working miniature entirely governs how long we take, where the detail is required, and the ultimate intended outcome. Thinking backwards from the intended outcome all the way back to the design is crucial, as it will form the rules how to  miniaturise the real thing.

For instance, the givens for most of our model locos is that we expect them to run on a club track, but this requirement brings about some key changes to the model that we can't always scale down.

The width of the wheels and flanges  needs focus, and thoughtful consideration given to what the loco is expected to do and look like.  These wheels must be suited to the track, and a key relationship to understand here (not often discussed) is overhang of the wheel over the rail for 100% contact on curves, out of gauge track, and oil slinging. If the wheel face is shy of or over the rail head, particularly on steam engines, the oil on the wheel from oiling the axleboxes and the side rods will be slung off, greasing up the rail...we've all been to the club runs where second day in, the track is like a skating rink thanks to a few greasing locos!

Another thing to consider regarding wheel width is the flange. Leading flanges especially on 8 coupled driving wheels do suffer significant wear on cornering, and hence why we have a wider AALS flange. This also happens on full size, I can describe a few full size 8 coupled locomotives with lubrication on the leading flanges to try counterract this.

For 5" gauge, combining the width of AALS flange and width of tread to overhang a 10mm flat bar rail on a curve would make a wheel approximately 18mm wide. The full size wheel in 5" gauge would scale from 5-1/2" wide down to 12-13mm. Using a fine scale wheel of 9/16 (14mm) would work and look prototypical with an 8mm flat bar rail, but the fine scale flange has 1/16" less material than the AALS flange.

The wheel width can have a reducing effect to the scale spacing of the frames. This comes into consideration when a smokebox or firebox has to fit between the frames. Not many impacts to a bar frame wide firebox loco.

The second impact of wider wheels is the possible reduction of bearing width on the rods, and tighter clearances of rods and crank pins behind crossheads.

A way to overcome these problems is to consider increasing the scale of the loco. I am one for boosting the scale factor slightly, which I hope to discuss more in future.

So there are some things to consider when building a dream loco, what are the main requirements, and how to get a philosophy to help make life easier building the model. It's always good to know what the implications are of making some key choices.

Happy steaming!

www.npwoolley.com

Saturday 3 December 2016

Victorian Railways H class drawings

I have just received back some drawings that I got scanned in for a 3 cylinder VR H class (Heavy Harry).  The loco GA, tender tank, and underframe  All quite clean drawings.  Would certainly make a large and impressive model! 

If you're interested in what drawings are here for the H or can assist to swap to build this collection that would be fantastic!  Would love to hear from you!

www.npwoolley.com


Thursday 1 December 2016

Girder stays for the Pansy boiler

A couple of girder stays were made for the Pansy boiler instead of the traditional longitudinal stays...the original design doesn't comply with our boiler code and there are some large areas on the backhead under-supported.

This also provides 100% support so the regulator is not in tension.

They are quite chunky!

www.npwoolley.com

Basic 3D with Draftsight

For the last few years I have been using Draftsight for 2D drawings, an excellent free program that functions just like AutoCAD LT.

Discovered somewhat by accident last night, I was surprised to see how the 3D side of Draftsight works.  It is very limited, no Boolean operations can be performed, no joining of parts, or drilling holes.  But it's there.

It will also do a functional rendering job, I didn't spend too much time playing with the lights but I'm sure a better render can be done when set up.

I had a quick go at a smokebox, it's not too bad!  Also I was able to import a 3D model which was done on AutoCAD.

Check out Draftsight, it's a professional level 2D program, an easy free tool to use for getting started on CAD.

www.npwoolley.com